Want to make your own DIY Advent Calendar? Check out our FREE Santa beard advent calendar printable!
Christmas is fast approaching, and we’ve been planning lots of fun festive activities on the run up to the big day, that can be done safely, and on a budget this December.
Advent calendars have changed HUGELY since I was a little girl; and I have just published my round up of the best Advent Calendars for kids in 2020, however, I am also VERY aware that not everyone will be able to afford to buy an advent this December, and for that reason, I’ve got your back! Introducing the FREE to download Santa beard advent calendar printable which you can print out and create at home with your kids. Each day of December, simply add another little part of Santa’s beard, gradually bringing his face to life over the course of Advent.
All you will need is:
Our Santa beard advent calendar printable
Some cotton wool buds
A jar or container to store them
A pink, red or other colour circle, pom pom or button for Santa’s nose
Glue or (ideally) double sided sticky tape or sticky pads.
A printer to print out your Santa template
First up, download your FREE Santa / Father Christmas PRINTABLE here:
The Santa printable prints 2 copies of the Father Christmas, so you can have a spare or one for siblings too.
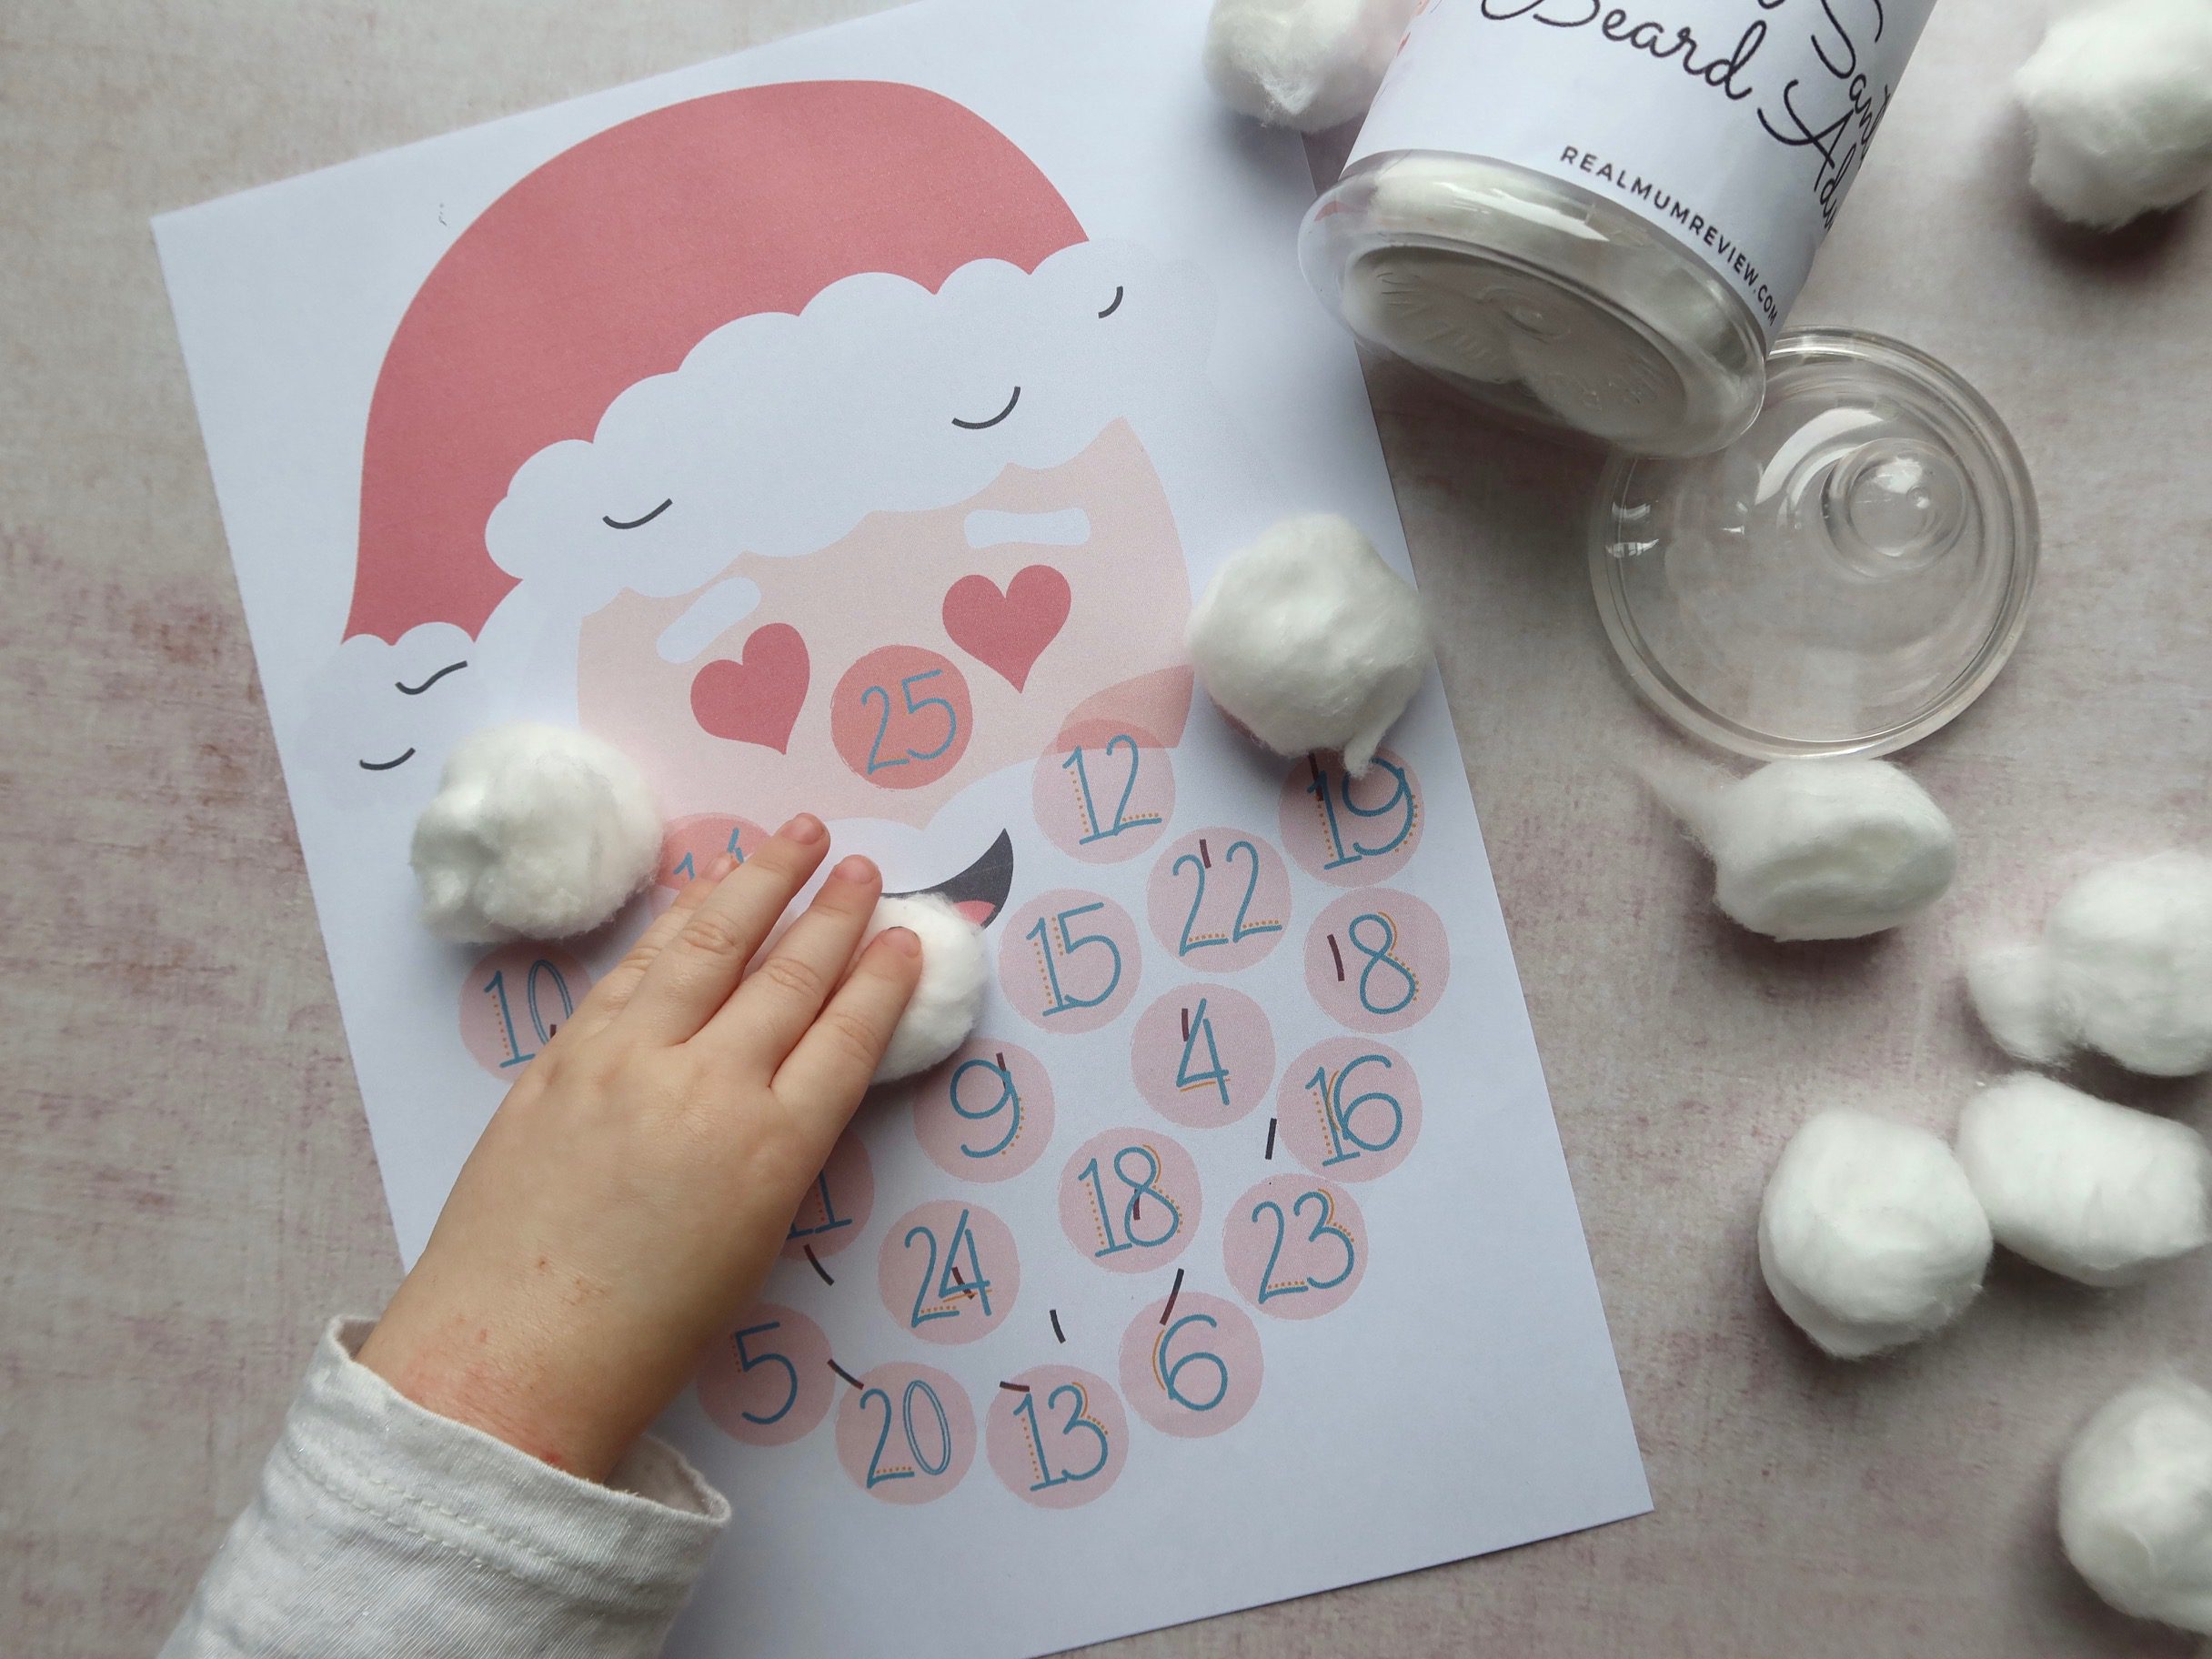
The Santa’s Beard Advent Calendar comes with 24 numbered circles (with the numbers mixed up at random).
Each day, ask children to add a Pom Pom / Cotton Wool ball to Santa’s Beard between the 1st and 24th December, sticking it to the apporpriate circle of his beard. When they get to Christmas Day, let them add a final red or pink pom pom / sticker for Santa’s nose.
We chose to put all of our cotton wool balls into a little jar, which Neve loved pulling out the cotton wool balls from ready to stick them on.
How you stick the wool on is entirely up to you, but double sided sticky tape works really well. Parents can stick a sticky tab to each morning and then the child can pop the cotton wool in place.
As the days of advent go by, Santa’s beard slowly but surely comes to life!
Neve got a bit carried away here and stuck on the nose before we had finished the beard, but you get the general idea! (Who ever said to work with animals or kids was right!)
This would make a super fun advent calendar on a budget, or just a fun festive craft activity to do with the kids on the run up to Christmas.
The Autumn months have well and truly arrived and everywhere you look you can see fallen leaves and the beautiful colours of brown, orange and gold. As beautiful as Autumn can be, with the days often being dark, cold and wet AND finding ourselves back in lockdown, we are all spending a lot more time at home than usual. As such, we have been embracing the craft activities more than ever and finding some fun things to entertain the girls in the comfort of our own home.
You all fell in LOVE with my autumn ballet dancers craft (which you haven’t already seen you can find HERE), so now I have another one for you – Autumn Tree Crafts.
This Autumn craft for kids is SUPER easy to do, and fun for all ages from preschoolers to older children.
To help your children make their own Autumn Tree Craft activity, you will need:
Cotton Wool
A variety of coloured paints e.g. brown, orange, red, yellow (any Autumn themed colours)
You may want to print off a few copies so they can have a number of turns!
Pour out a small amount of each paint colour somewhere that is easily accessible for your child.
Using the peg, clip the peg on to a cotton wool bud before dipping into the paint colour of your choice and printing on to the paper to create the impression of bunches of leaves.
Keep dipping the cotton wool in different colour paints – it works well if you keep mixing them up, as it creates a more realistic tree effect. Using the peg makes it super easy for small hands to hold without getting completely covered in paint (although keeping it real – Neve still managed to get it everywhere – it’s what she does best!)
Keep on dabbing until your tree really starts to take shape! Don’t dab too hard or some of the cotton wool come away too (see below!)
Allow to dry and there you have it – a beautiful Autumn tree! 🙂
As you can see I have created two different types of tree to print out, so you can even create a bit of a woodland scene or combine with real leaves to help bring their craft creations to life!
We hope you enjoy making your own Autumn trees with you children this season!
Keep following our page as we are creating more printables soon to keep the children busy on the run up to the Festive period!
I absolutely love Autumn. As much as I love the Summer and enjoyed the freedom of early morning runs and long sunny afternoons in the garden, I love it when the nights start to draw in too. The colours that Autumn brings with the oranges, yellows, reds and golds is absolutely stunning, and as a blogger – its pretty much a photography dream! 🙂 We love heading out as a family for walks by the canal, and having a bit of a scavenger hunt as we go, collecting conkers, acorns and pretty leaves for craft activities when we get home.
When the seasons change however it can be MUCH harder to keep little ones entertained at home.
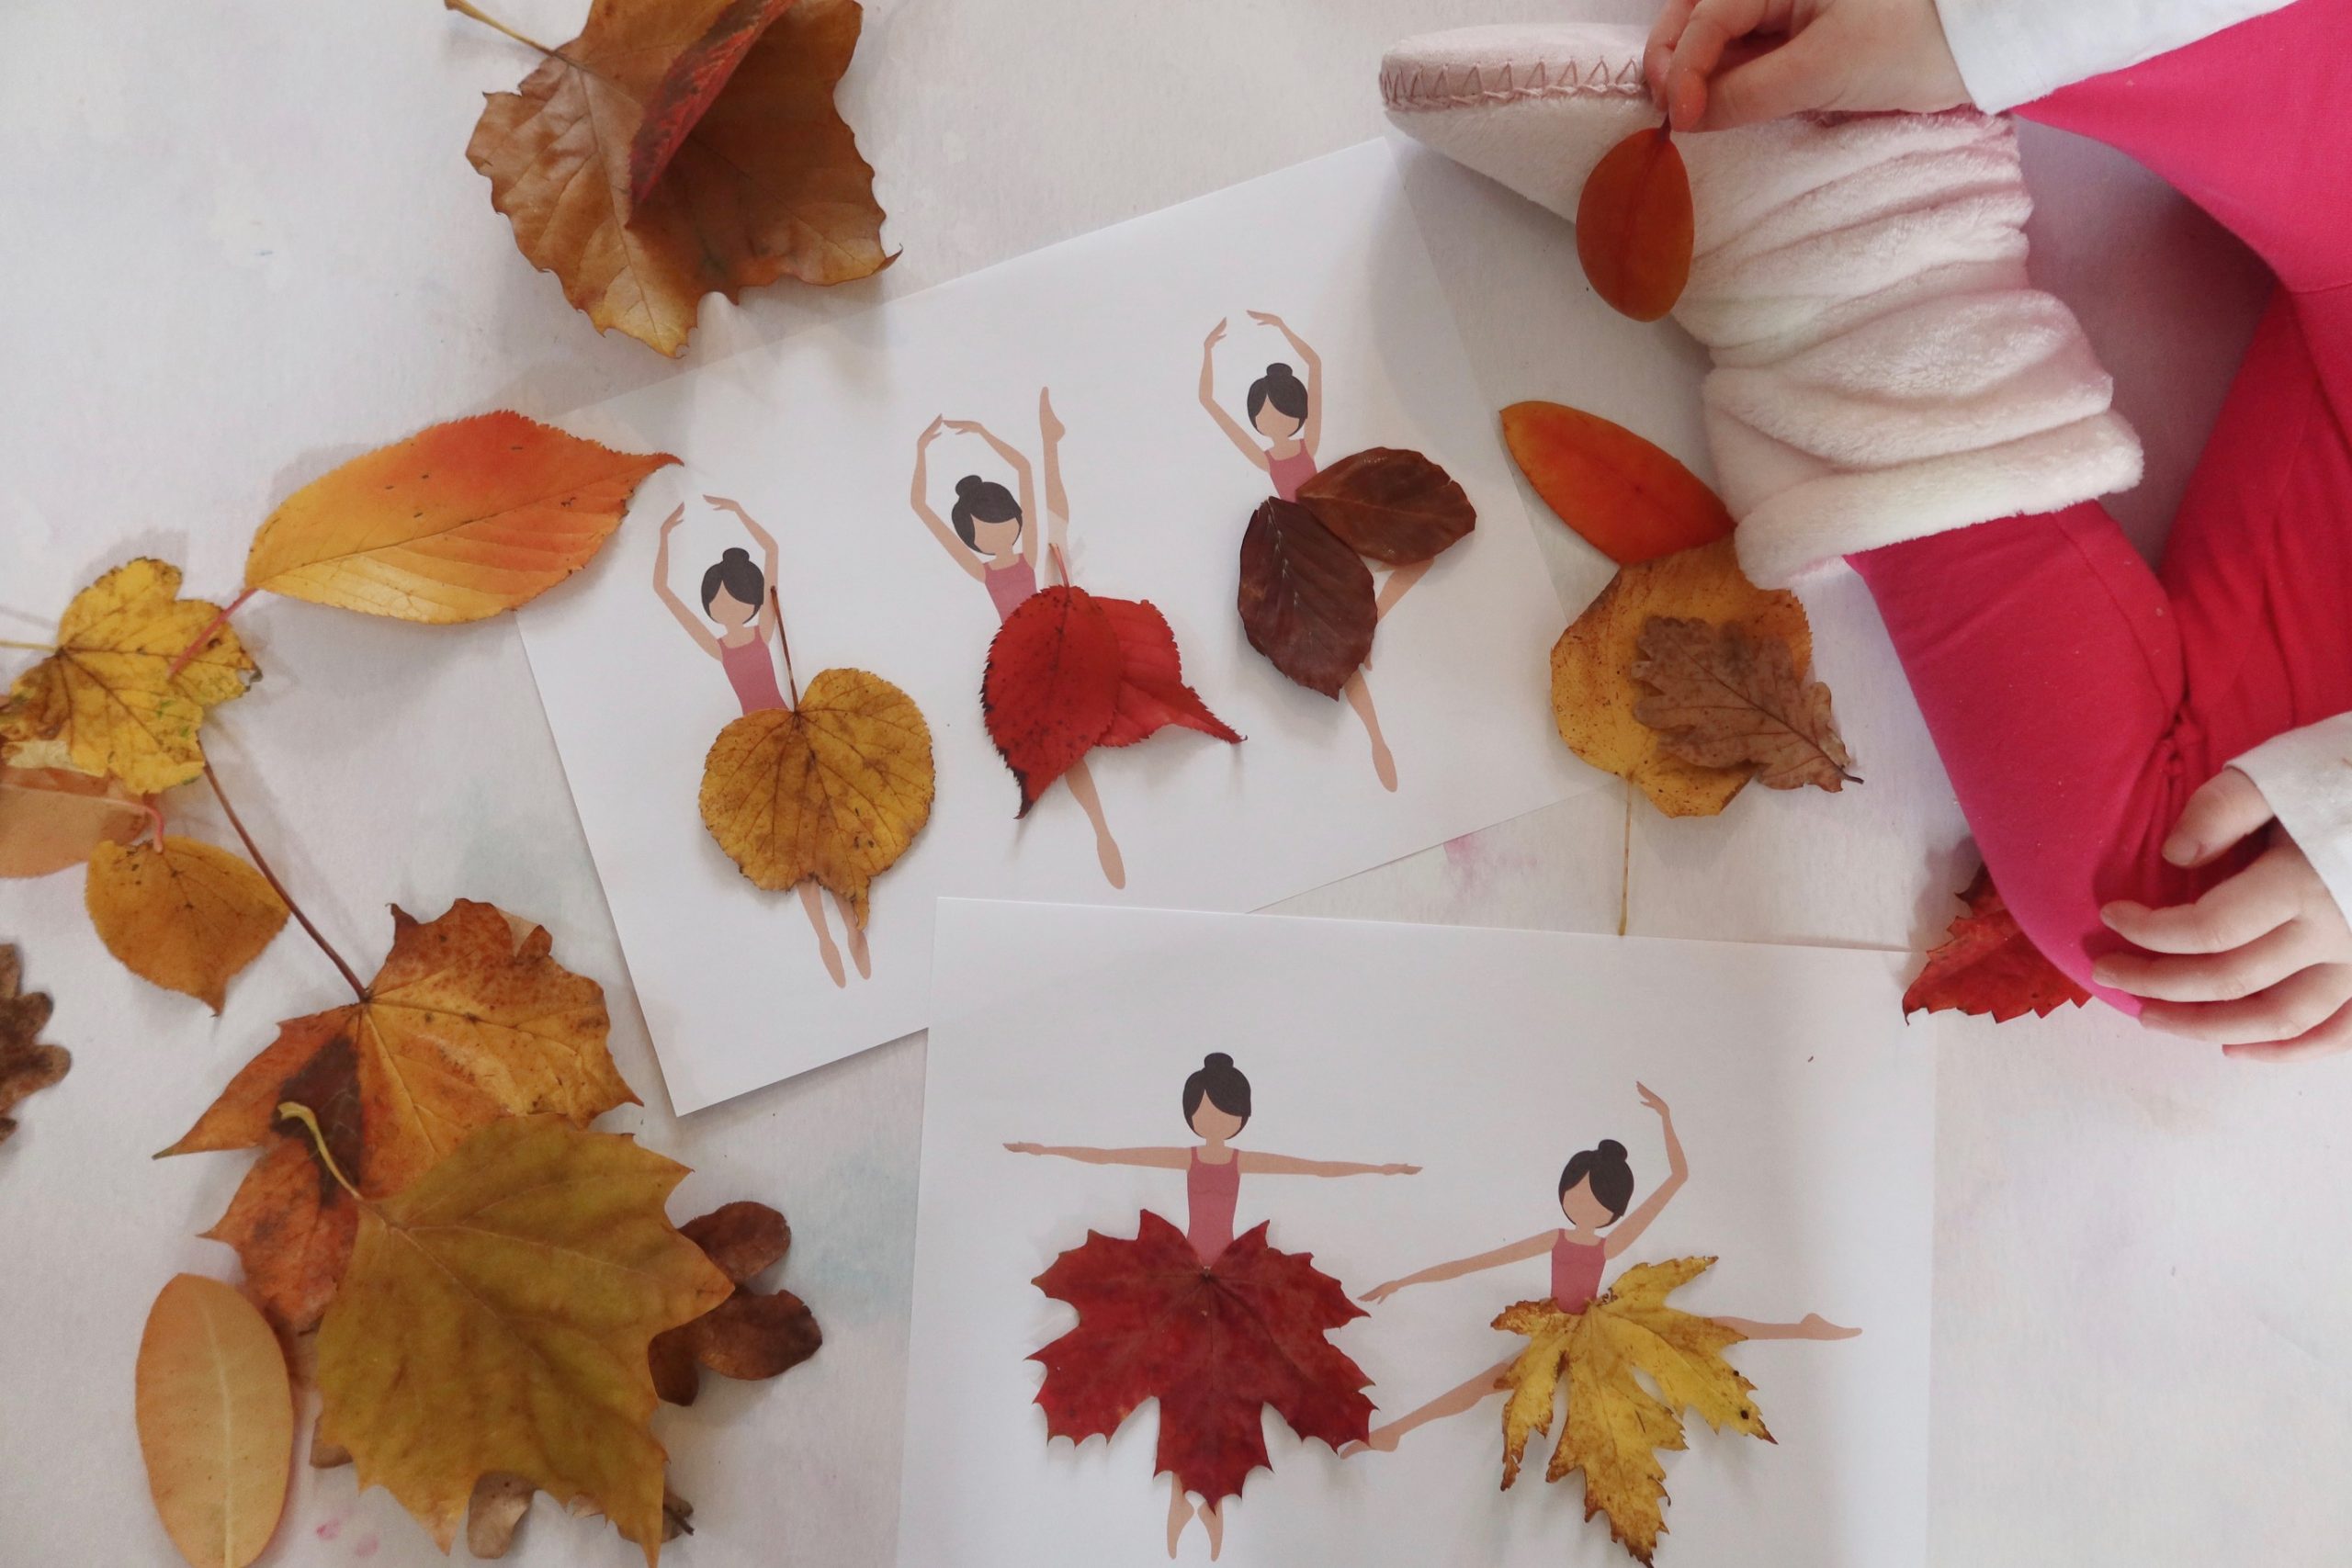
Here is a super cute fun Autumnal activity to do with your children – Nature’s Autumn Leaf Ballerinas – which not only keeps them quiet and entertained for ages, but is relatively mess free and requires very little in terms of resources to get involved too.
Using my free printables you can print off the ballerina leaf designs before collecting your favourite leaves to turn into beautiful autumn coloured tutus and dresses.
First up – head off on an Autumn walk with the kids and ask them to collect the prettiest dress shaped leaves they can find. It’s good to try and get a real mix of colours and shapes, but the maple leaf style work well. Whilst the giant ones look fab, you’re probably best to get slightly smaller ones as these work best with our templates.
When you’re back home, warmed up and have got your slippers on, print off your FREE Nature’s Ballerina printables by clicking on these downloadable PDF links below:
Before you start sticking, lay out your leaves and practise moving them around to see which ones look best. You may find some just don’t work at all (we certainly had a few rejects), but some laid together can create a really pretty skirt like effect.
When you are happy with which leaves fit best where, bring out the glue and get them to apply generously to the paper before sticking their leaves into place. You may find some of the edges curl up slightly but that can actually add to the effect. We used a glue stick, but any kid safe glue should do.
Sit back and watch as your children’s ballerinas come to life! I love the finished effect of these and Neve had loads of fun creating her different outfits.
We hope you enjoy our Autumn Ballerina Craft activity. Look out for more Seasonal craft activities coming soon!
Yesterday, I shared my Alternative Easter Gift guide– as much as I love chocolate (and so does Erin!), I cringe at the amount of cocoa that gets consumed over the Easter holidays! At just 4 years old, I never cease to be amazed at the amount of chocolate eggs she gets bought, in all shapes and sizes.
My guide shared a range of non chocolate alternatives, including healthy snacks, toys and crafts, and I am over the moon to have one of the Sambro Easter Craft Eggs to giveaway to one lucky reader! 🙂
The Product
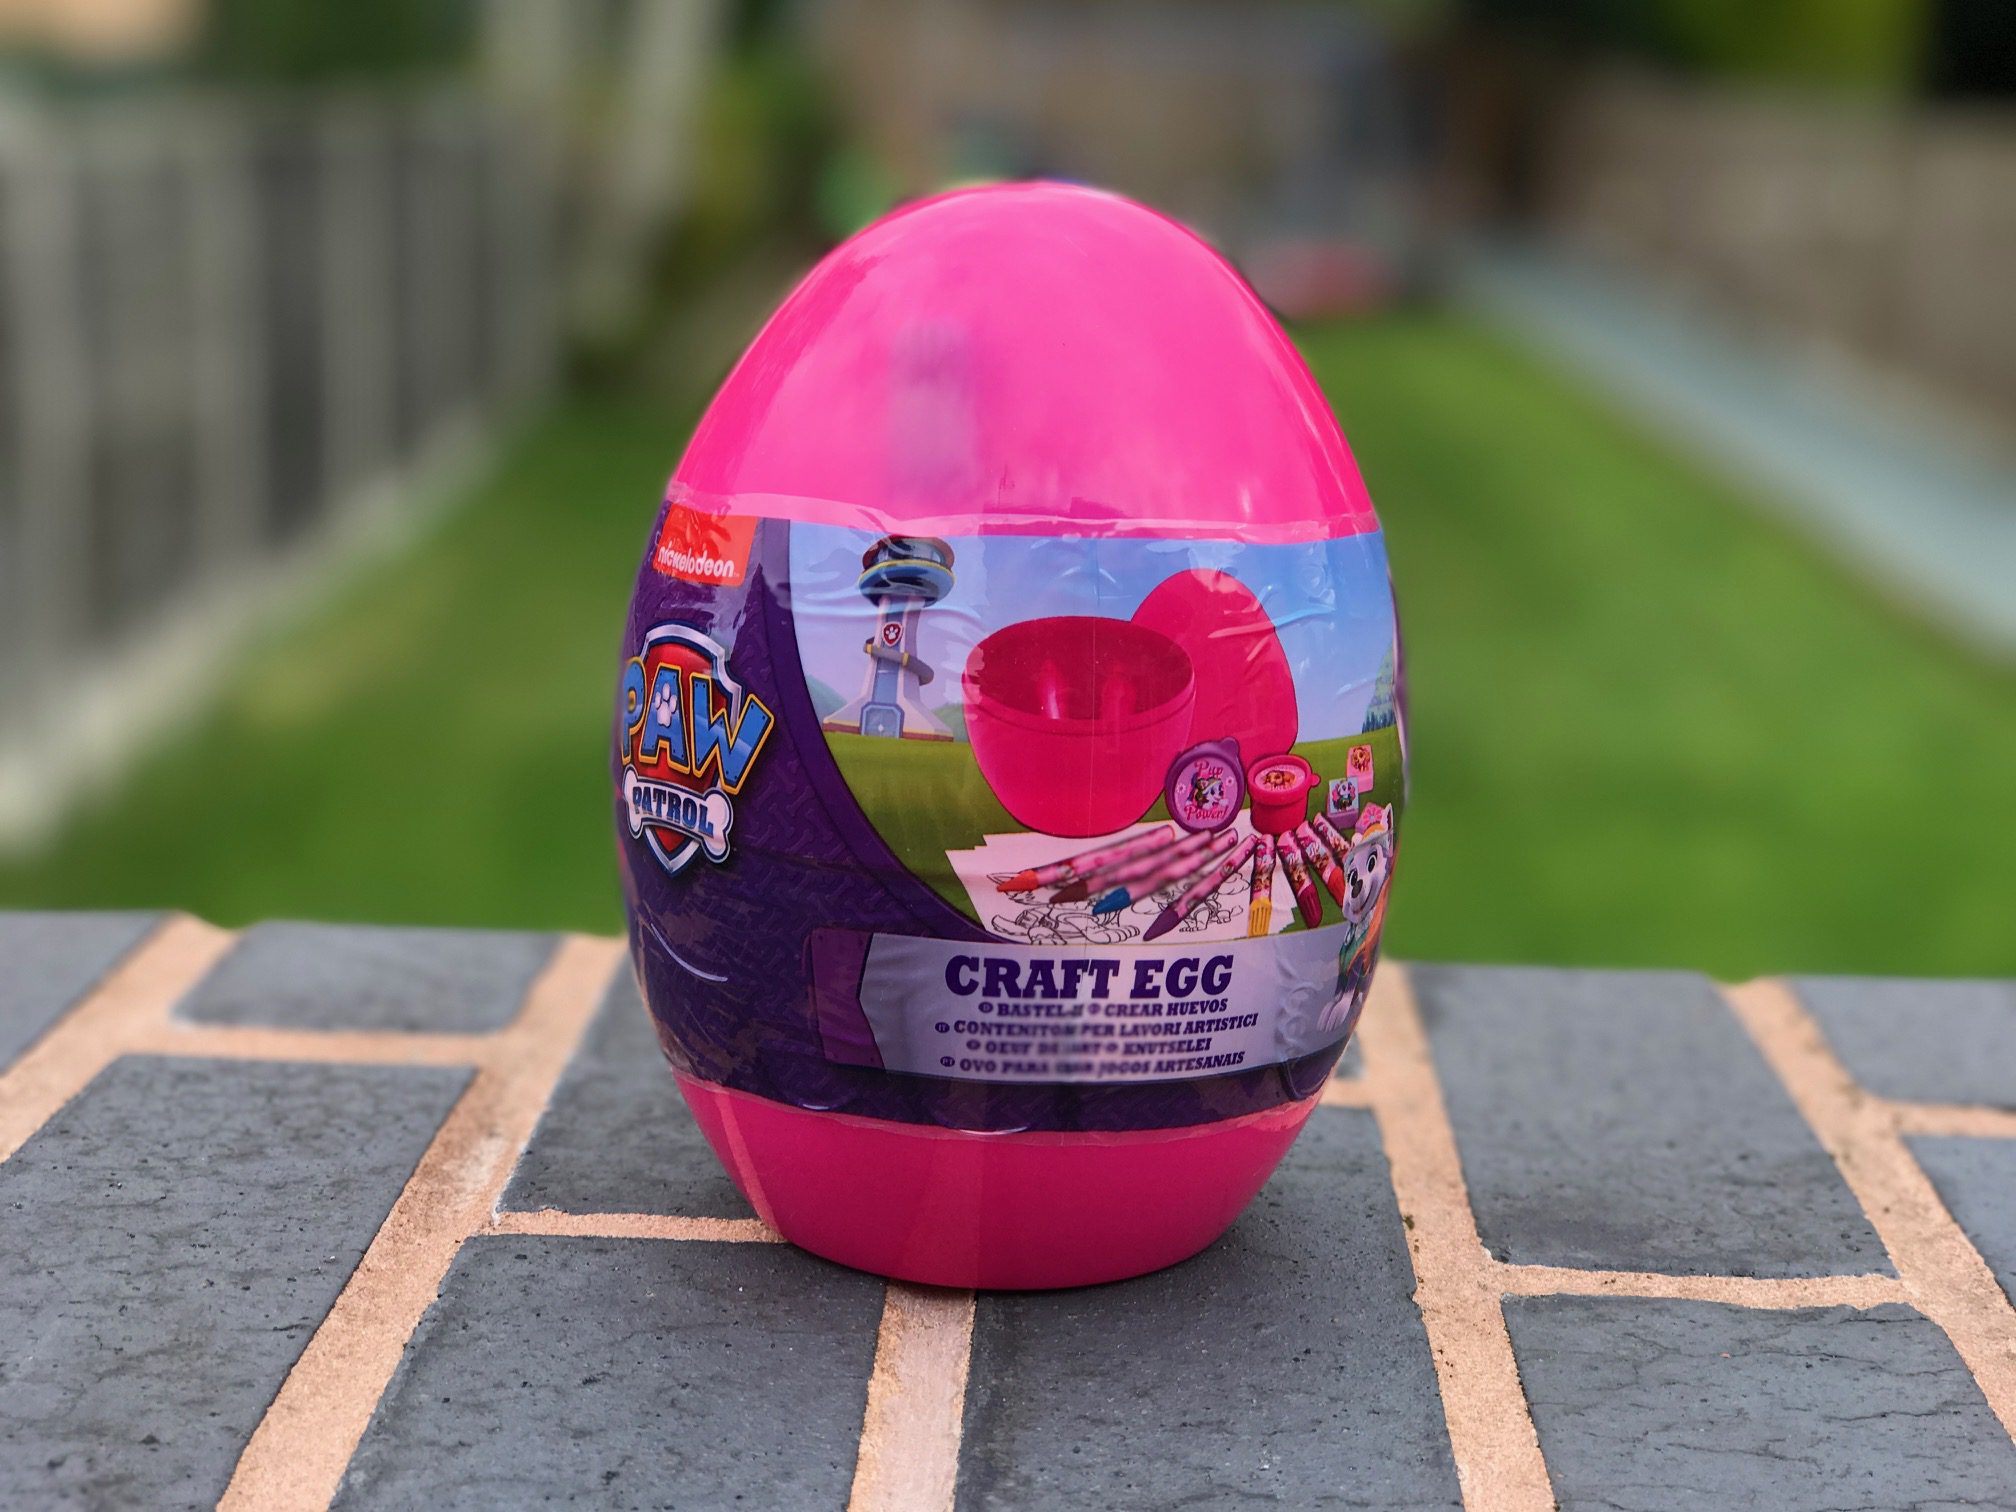
Sambro have produced a range of new Easter Craft Eggs, containing everything you need to keep your little ones occupied over the Easter holidays! These giant plastic eggs come in a variety of themes including Paw Patrol, My Little Pony and Shimmer & Shine and retail at £5.99. They are available at a range of toy stores and online retailers including Amazon.
We road tested the My Little Pony Craft Egg with Erin.
She was VERY excited to get it open and discover what was inside. Due to the plastic lining around the egg, she wasn’t able to get in herself and so Mummy needed to help! It’s not the easiest of plastic wrappers to remove, but once we got the scizzors out we were quickly able to pop open the egg and reveal the contents.
The reuseable giant pink plastic egg contained:
10 x colouring in sheets with a variety of My Little Pony Designs
2 x finger paint pots
2 x ink stamps with a heart and star design
4 x Wax Crayons
4 x Felt Tip Pens
Erin got to work right away at creating her masterpieces – she LOVED the little stamps, and enjoyed printing hearts over the paper provided.
Word of advice – read the contents first before you let your child open the finger paints unaided – I made that rookie mistake as didn’t realise what they were! 🙂
The egg and its contents kept Erin quiet and entertained for a good 30-45 minutes, which for a lively 4 year old is pretty good going! 🙂
Overall, these are a great alternative Easter Gift for children, suitable for both boys and girls. We loved the fact the egg can be reused, so you can surprise your children with extra treats from the bunny if they are good! 🙂
We have 1 x Paw Patrol Craft Egg to give away!! Use Gleam to enter below!
Ever since I was a child, I have been a massive fan of Eric Carle’s book – The Hungry Caterpillar. My Mum used to read it to me as a child, and just like my daughter does today, I had a massive fascination with poking my fingers through the holes as the caterpillar worked his way through his long list of lovely foods! 🙂
From the age of 2, The Hungry Caterpillar became one of Erin’s favourite books, so when she turned 3 earlier this year, it seemed like the obvious choice of theme for her party! 🙂
We recently learned about the range of fabulous Hungry Caterpillar crafts from the Rainbow Company Ltd, and when we were offered some to test out, I knew that these would be right up Erin’s street.
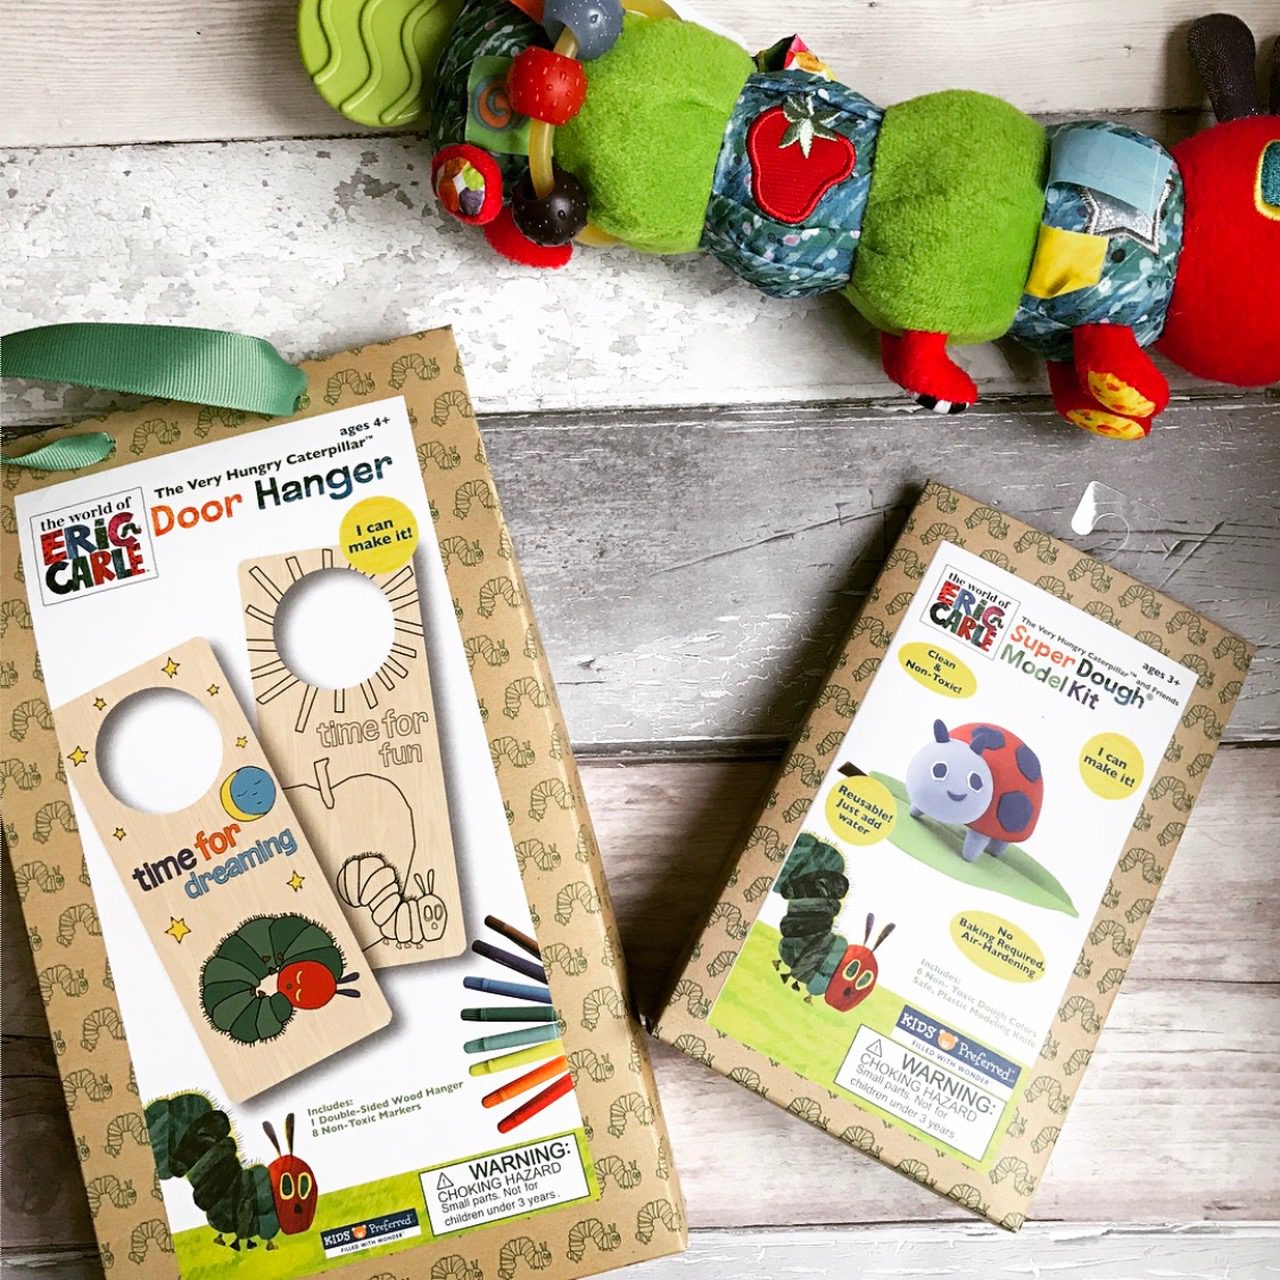
We were sent two items from the range – The Door Hanger and The Super Dough Model Kit.
Door Hanger
The Door Hanger kit features a wooden hanger with a different design on each side – this can be hung on your child’s bedroom door and turned around to show whether they are sleeping or awake, and whether or not they can be disturbed. The kit comes with a packet of pens with 8 different colours which children can use to colour in the wooden hanger. The pens are perfectly sized for little hands and glide onto the wood very easily. We did find that they do dry out quite quickly however if left with the lid off, so ensure your child replaces the cap quickly after use to ensure the colour stays bold!
Erin is not great yet at staying within the lines yet, so we had the odd ‘slip’ in her colouring but overall she did very well.
This was a fun, calm, colouring activity that kept Erin occupied and quiet and she really enjoyed watching the design come to life as she coloured, even if her approach to writing letters in the apple before she coloured it was a little unorthodox! 🙂
Super Dough Model Kit
The second kit we were sent was the Super Dough model kit – a mouldable ladybird figure. Inside the packet was all the coloured air dry dough needed to make the design, in just the right quantities (enough to make more than one). This air drying dough is a little different to Playdoh, so wasn’t quite the consistency I expected – a bit more stretchy and less squishy to the touch. The biggest challenge was removing it from the packaging to start with, but once we had done that Erin enjoyed making the character and rolling it out with a rolling pin (not included).
The spatula included was quite hard to use to cut through the dough so Erin did require some help.
Once we had created our character, we left it to set. The product sets quite quickly when left in the air to dry, but can be wet again in order for the dough can be reused.
Again this was a fun activity that kept Erin quiet and content, however this one needed a little more adult involvement as she was unable to cut the dough on her own.
Overall, we loved both products from the Hungry Caterpillar range. If you were having a Hungry Caterpillar themed birthday party for your children, I think these would make a great alternative to a party bag – far more useful than a load of plastic toys or a recorder that will end up in the bin! The full range of Hungry Caterpillar crafts can be purchase from selected Tesco stores.
Would you like to win a set of Hungry Caterpillar crafts for your children?
We have a set to giveaway! Use the gleam app below to enter and GOOD LUCK!!! 🙂
T&Cs – Winner will win one Hanger Kit and one Super Dough Model Kit from Rainbow Designs Ltd. Winner chosen at random. UK Only. Please allow 28 days for prize delivery.
As regular readers will know, I love crafting with the girls. I also love gifts with sentiment, and would much rather receive a personalised or home made gift than an expensive item with no thought behind it. As a result, when it comes to planning gifts and cards for our friends and family, I always love to get the girls involved with something handmade.
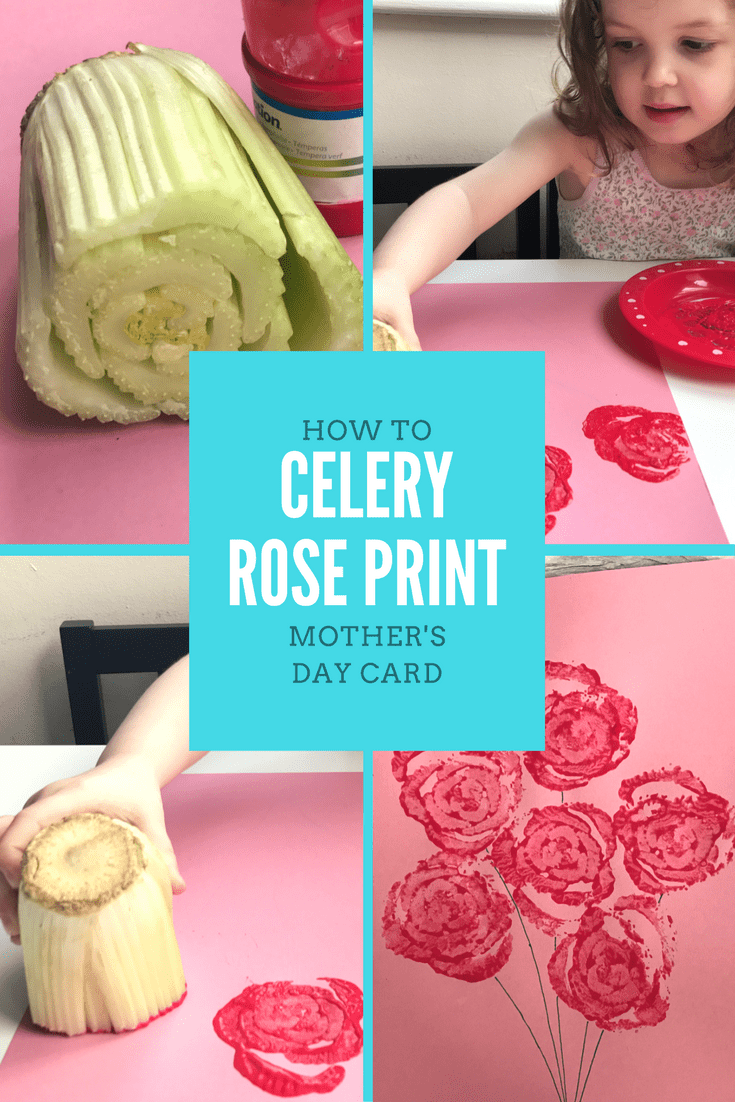
With Mother’s Day around the corner, I decided to be a little unorthodox and help Erin make a Celery Rose Mother’s Day Card – a super quick yet incredibly effective way to create a personalised card in minutes! As for watching her make my own card – it’s not totally strange, as we also made one for Nanny and her Godmother too! 🙂
These Celery Rose Print cards are super easy to make and the finished effect is really great! They look just like little red roses, and cost far less to make than a shop bought card. They are also so much more personal and Erin absolutely loved making them.
To make your own celery rose card, you will need:
A bunch of celery (cost around 70p)
Red Paint
Paper or Card
Simply chop the bottom end off the bunch of celery, leaving a bulb big enough for your little one to hold. You will notice immediately that the end looks incredibly like a rose – it really is this simple! 🙂
Dip the celery in to the red paint and stamp away! 🙂
We created a fun celery rose bouquet type design and Erin had lots of fun in the process! 🙂 What do you think?
Hi, I’m Lucy, a thirty something mum of two from Birmingham. A memory maker, tradition keeper, stationery addict and Mr Men fanatic. HR Advisor by day and sleep deprived Mama by night!
This website uses cookies so that we can provide you with the best user experience possible. Cookie information is stored in your browser and performs functions such as recognising you when you return to our website and helping our team to understand which sections of the website you find most interesting and useful.
Strictly Necessary Cookies
Strictly Necessary Cookie should be enabled at all times so that we can save your preferences for cookie settings.
If you disable this cookie, we will not be able to save your preferences. This means that every time you visit this website you will need to enable or disable cookies again.
3rd Party Cookies
This website uses Google Analytics to collect anonymous information such as the number of visitors to the site, and the most popular pages.
Keeping this cookie enabled helps us to improve our website.
Please enable Strictly Necessary Cookies first so that we can save your preferences!