


So Slime DIY Slime Shakers REVIEW
#ad – items gifted for review
I am yet to meet a 5 year old who doesn’t have a slight obsession with Slime, and Erin is no different. She absolutely loves the bright colours, the tactile touch and feel, and the ability to stretch, pull and squish it to her hearts content. I’ve seen so many YouTube videos of people attempting to master the ‘make your own’ slime batches that I have always fancied giving it a go, but in the same breath I have heard lots of people say that their attempts have never gone quite according to plan, and as such, I have never been brave enough to give it a try!!
When I was offered a set of So Slime DIY to review – a make your own slime set which promises no mess and ‘simply add water’. This felt like the best of both worlds – enabling Erin to make her own slime in the comfort of our own home, but in a controlled and managed way which didn’t rely on me measuring the right amount of ingredients or more importantly – screwing it up!
We couldn’t wait to set to work. We took the So Slime DIY 3 pack away with us on holiday, and at a suitable moment when her younger sister was napping (and as such out the way from attempting to steal the slime!) we decided to set to work! Here’s what we thought.
About So Slime DIY 3 pack
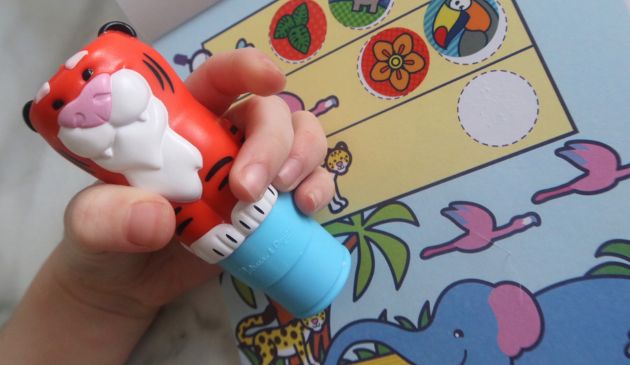
The So Slime DIY 3 pack comes with 3 pots (in three different colours), and everything you need to make 3 lots of slime (colours may vary). In each pot there is a small sachet of slime powder, a packet of glitter or sequins to give it a sparkle effect, and a small collectable character which can be hidden inside the slime and stretched and pulled to reveal the surprise.
To create your slime, you simply add water to the pots as per the instructions and shake for 30 seconds. The powder blends to create a stretchy and tacky slime which can be blended and moulded to your heart’s content.
The 3 pack retails at £9.99, but is currently on offer at Amazon for £7.98.

Our Experience
Erin was super excited to make the So Slime DIY set, and the fact there were little packets of all the ‘ingredients’ was something that helped add to the anticipation. She enjoyed pouring in the powder to the pot and sprinkling in the glitter, before adding the character into the pot and gently adding the water. From a parent’s perspective, it was great that the slime itself didn’t need to be created by hand – so we didn’t need to worry about loads of mess or particularly sticky fingers!

One thing to be aware of here is that the water measure line on the inside of the pot is pretty exact. Put in too much water and the slime won’t form as expected (this happened with one of our tubs – possibly because Erin was a little heavy handed in her measures!). As such, you may want to supervise this part of the process to ensure it is done correctly.

Once the water has been added (up to the fill line) we replaced the lid and shook the pot for 30 seconds. I found it was good to shake the pot quite vigorously, as you could actually feel the resistance start to increase as the slime started to form inside.


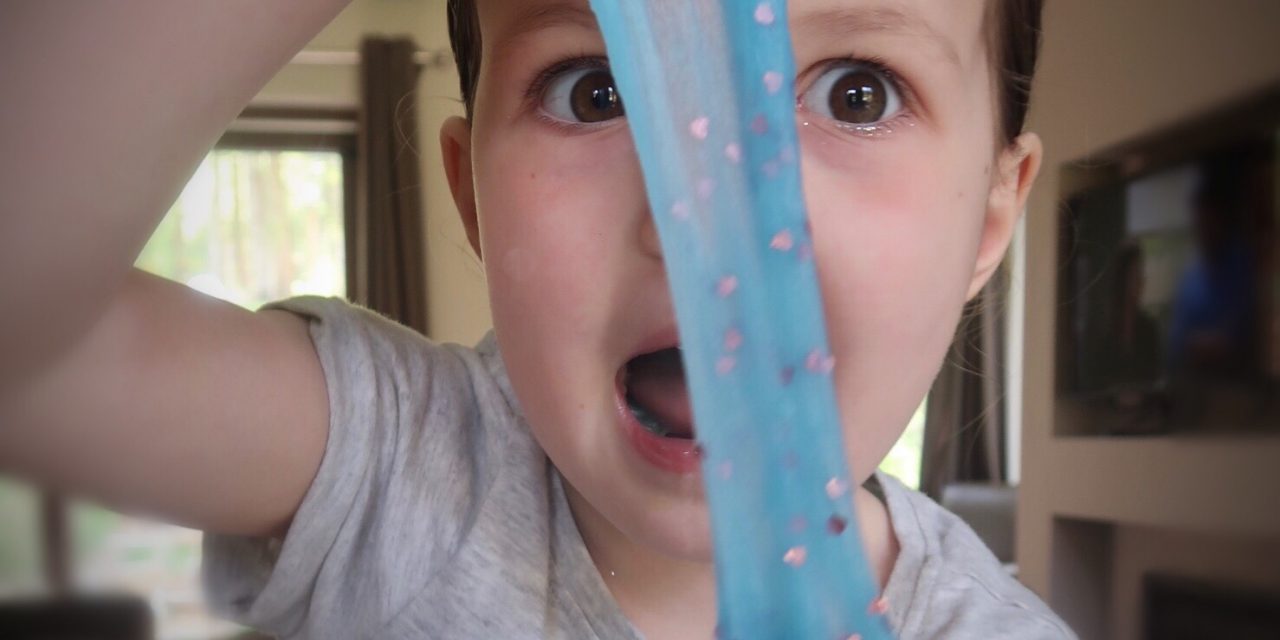
Once opened, the slime could be pulled out in one big portion, and was immediately ready to use. Erin really enjoyed hiding the surprise toy and stretching the slime to reveal. It’s worth noting that some of the glitter does come out of the slime on to your child’s hands, but I didn’t think this was a major problem – also you should encourage your children to avoid dropping the slime on the floor, as being tacky in nature, it does attract dust and dirt unless your floors are absolutely spotless!


Slime has hit the media a lot recently (with Which completing a survey of slime products many of which contained unsafe levels of Boron). It is important therefore to specify here that the So Slime DIY sets were not included in Which’s research, but that they have passed all the required EU Product Safety Testing including those for Boron. This is again peace of mind for parents that the products are totally safe to play with.
Overall, the So Slime DIY sets were a big hit. I think they are relatively good value for money, and are perfect for a fun creative play session during the Summer holidays. If you follow the instructions accurately, the slime sets are quick, easy and mess free, and create hours of entertainment after they have been created. A big thumbs up from us.
You can check out the full range of So Slime DIY products here.
If you enjoyed this review you may also like the So Glow DIY range too – we recently created glow in the dark mood jars and they were loads of fun to make as well as being a great comforting light in a dark room. Shake to wake! 🙂
*Disclosure – we were sent a So Slime DIY set free of charge for the purpose of this review and compensated for our time, however as always, our thoughts and opinions are our own.*


