We love crafting for special occasions, and I have done this Valentine’s craft with my daughter since the age of around 8 months. It is something that is really easy for children of all ages, yet the finished effect is pretty impressive.
This has to be one of the most simple but effective Valentine’s crafts to do with younger children, perfect for babies and toddlers alike. It’s also a great for educational play, as it teaches hand to eye coordination.
To create your own Valentines picture / card with this design you will need:
Red Poster Paint
A toilet roll middle
Paper or Card
That’s it – three very simple requirements!
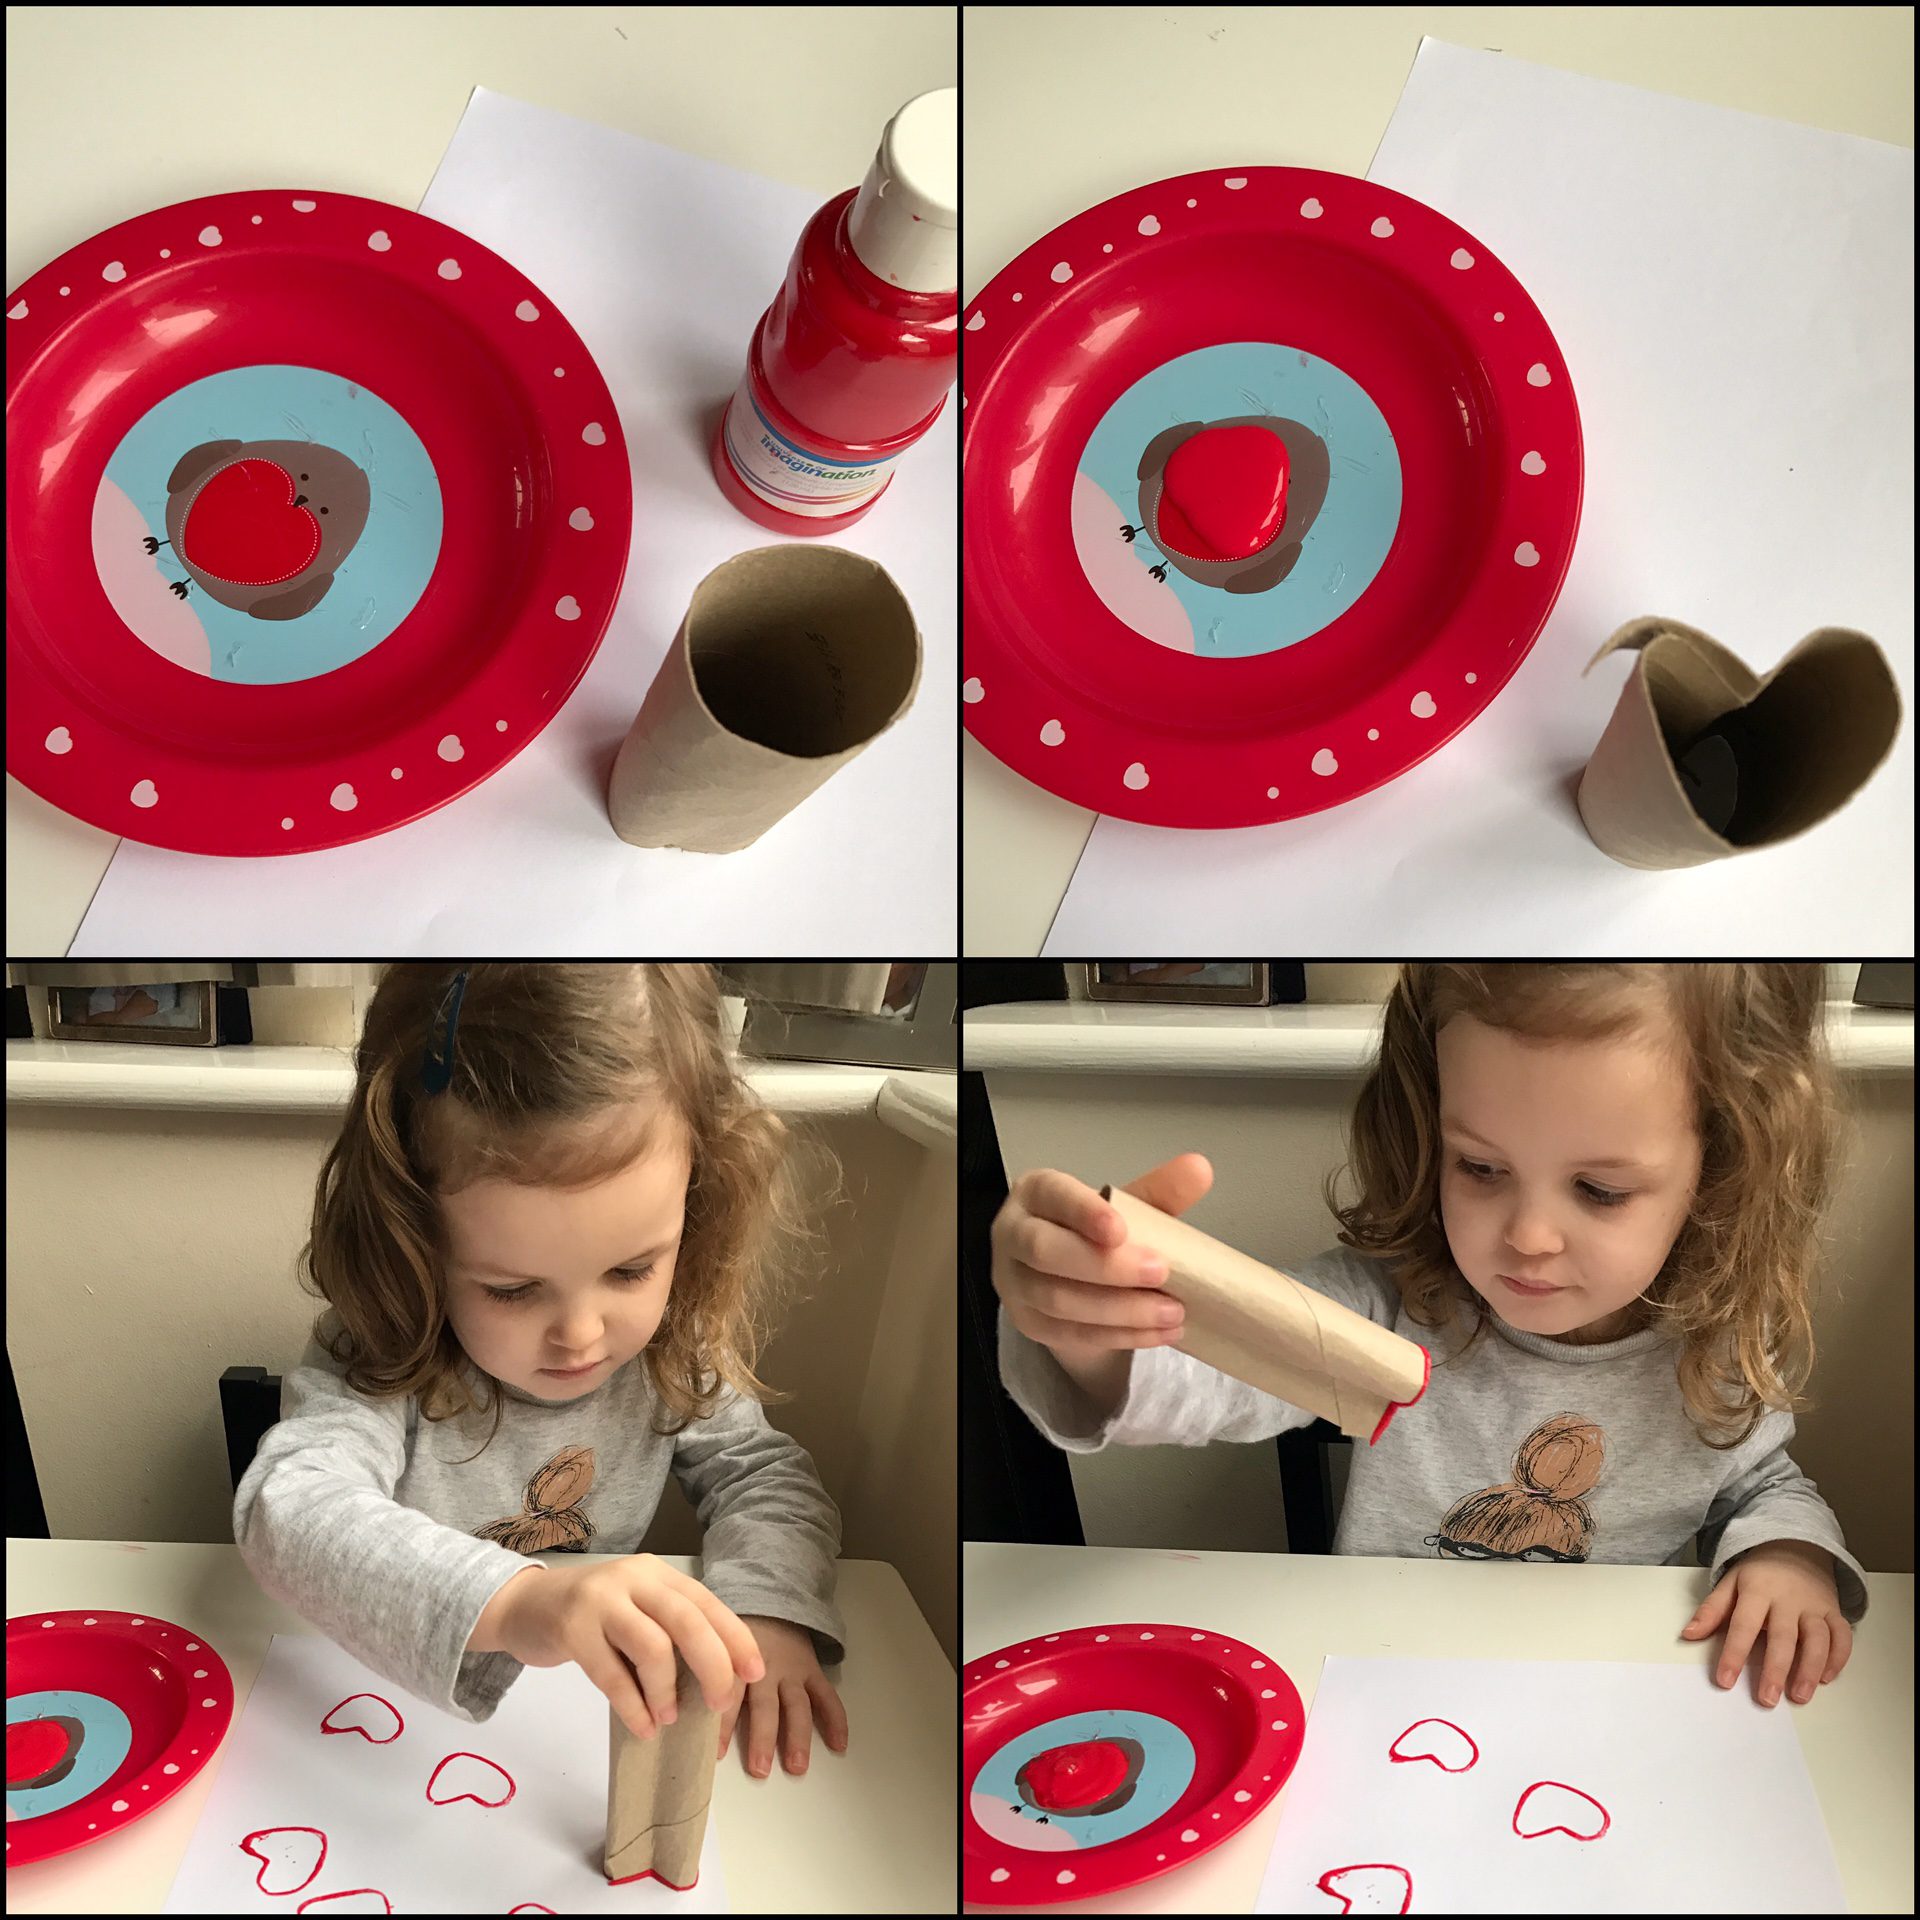
First simply pinch the top of one end of the toilet roll middle, in the centre to create a heart shape. This will then be used as a stamp.
Encourage your child to press the toilet roll middle into the red paint, and then stamp onto the paper or card.
Let them freestyle and create the design as they wish!
Perfect for that first Valentine’s Card for Daddy! 🙂
As you will know from my previous posts re Valentine’s Day, neither I nor my partner are particularly the romantic type. There will be no cards here, no roses and definitely no swooping declarations of love this February. However – we do have two daughters and I love nothing more than an excuse to make some cute Valentine’s craft and get them involved! 🙂
On Friday, we made our own Valentine’s craft potato print tshirts. These are SO easy to do but look fab when they’re finished!
To make your own, you will need:
a plain white tshirt or vest
some paper or card (to protect other side of tee!)
red fabric paint
a large potato
To begin, you first need to create your potato heart stamp. To do this, simply chop the potato in half and cut a heart design into the potato using a knife till you have something that looks like this…
Lay the tshirt on a flat surface and put some paper in between the layers so that any paint that soaks through does not reach the back side of you’re tshirt.
Stamp the potato into the paint and dab on to your tshirt.
You can do whatever pattern you like – we made two- one had hearts all over it and the other had just four in a diagonal row.
Leave the tshirt to dry. Depending on the make, most fabric paints are safe to wash after 24 hours!
Eh voila! I love the effect of the finished tshirts – super easy to make, Erin loved the stamping and they look great on!
Today, Erin and I have had another lazy day at home. It is currently 1pm, and we are all still in our jammies. This is what Christmas Holidays are for. I recently shared my Review of 2016, and am looking forward to what 2017 will bring!
As a bit of fun craft, we decided to create a 2017 wall calendar today. These are super easy to make, and look great on the wall.
To make your own you will need:
Coloured Cardboard
Paint
Dabber (optional)
Prittstick
Party Poppers x 3
2017 Calendar Book (you can purchase these from Hobbycraft or other craft stores).
String or Ribbon (for hanging).
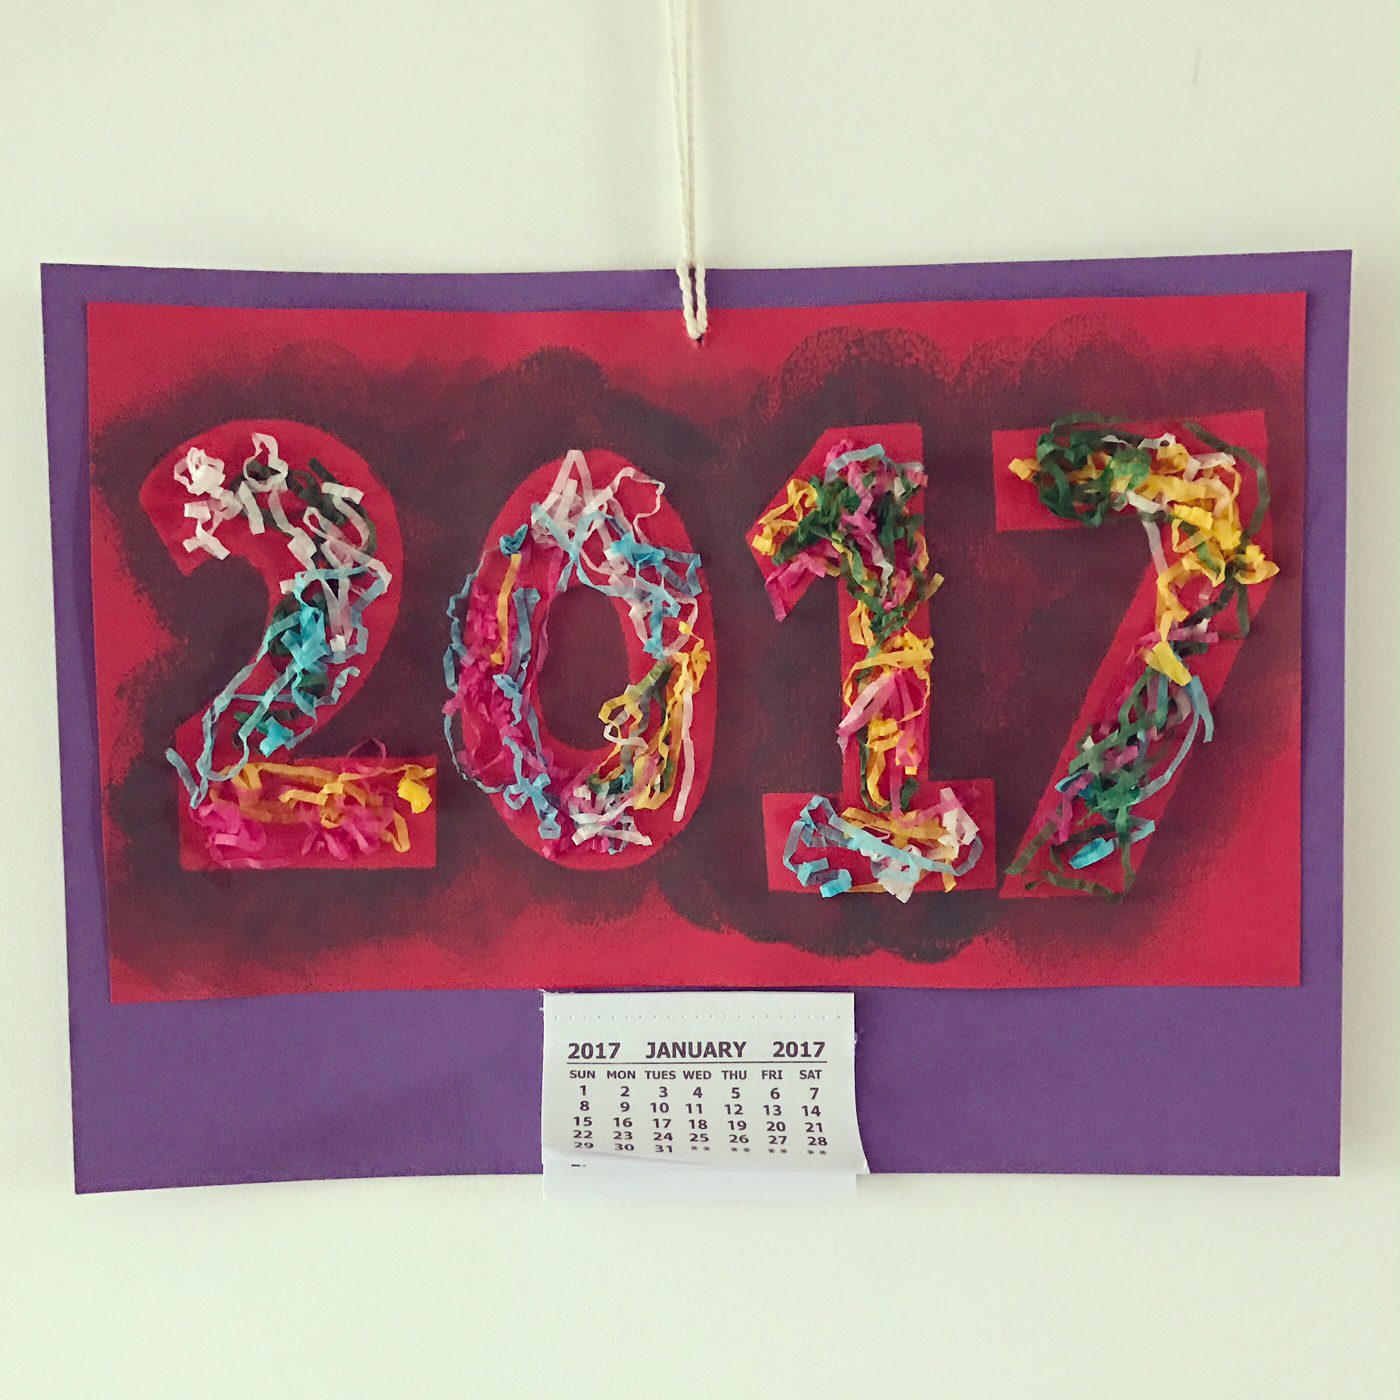
Firstly, draw and cut out the numbers for the year – in this case a 2, 0, 1 and 7. I did this for Erin as her scissor control isn’t there yet! 🙂
Using Prittstick or any other glue that dries clear, dab a small amount on to the numbers so that they stick in place when lay flatt on another piece of card.
Let your child use the dabber to dab paint around the numbers.
Peel away the numbers, to reveal the blank card beneath.
Pop three party poppers (Erin enjoyed this bit!). Put glue onto the numbers and then stick the party popper confetti in place.
Finally, mount the finished picture onto another piece of card, and stick on the 2017 calendar.
Punch a small hole into the top of your finished calendar, and thread the string (or ribbon) ready to hang.
Our calendar now has pride of place in the kitchen! 🙂
Wishing all my readers a happy and healthy new year! I hope it is a good one for you! 🙂
This time next week is Christmas Eve and the kids and I are super excited. Well ok, me and Erin are super excited…. Neve really hasn’t got a clue what is going on! 🙂 We are going to my in laws on Christmas Day and all taking a few food bits with us to make the ultimate Christmas dinner! I decided to make some Rudolf Reindeer Sweet Cones to take around as after dinner treats suitable for the whole family. I have seen these before on Pinterest, and thought that even I could manage to make these without too much of a Pinterest Fail! 🙂
I love how easy these are to make and your kids will love helping – especially with adding the eyes and bringing the Reindeer to life. The designs can also be adapted to make hot chocolate cones using hot chocolate mix and marshmallows instead of sweets.
You will need:-
cellophane sweet cones (available from Amazon, cake shops and eBay)
chocolate such as minstrels, malteasers, choc buttons etc
red sweets such as strawbs, haribo hearts or lips
brown pipe cleaners
googley eyes (self adhesive for ease!).
Erin loved helping pop all the sweets into the bag – and yes, it was a bit of a challenge to stop her eating them all on the way. First we added four or five red sweets and then topped up the rest of the bag to around half way with minstrels.
Using the pipe cleaner we tied a knot to seal the bag and then used my finger to create looped antlers (see pic)
Erin then added the eyes to create Rudolf’s face! We had adhesive eyes, so this was really straight forward. Alternatively you will just need a bit of glue to stick them in place.
And that’s it! It really is as simple as that! These would make great gifts for teachers or preschool staff, stocking fillers, contents for a Christmas Eve box or an under the tree surprise! 🙂
Anyone who reads my blog regularly will know, I am a massive fan of all things craft! 🙂 Now I have 2 children, I vowed that every Friday, my eldest and I would sit down a make something together. Not only does this give her quality one on one time with me, but can also be done whilst my baby sleeps. Erin loves it, and I feel far less guilty for not giving her the attention she had been used to prior to her sister’s arrival!
I was recently approached by Toucan Box to review their craft subscription box service – a flexible subscription service offering creative craft boxes for children aged 3-8 years. Coming up with my own ideas for creations can be difficult, so I was looking forward to having someone else do that hard work for me, and concentrate on the creating instead! 🙂
About Toucan Box
Toucan box is a craft subscription box service bringing creative projects to your doorstep so that you can spend less time trawling through toy stores and more time making mini masterpieces with your children! All their activities have been designed by educational experts to challenge children’s problem-solving skills and aid their creative development.
Boxes are available in three different sizes
Petite – a fortnightly box with 1 exciting activity – £3.95 + 98p postage
Grand – a monthly box with 2 exciting activities and a book to enjoy together – £9.99 + 2.95 postage
Super – a monthly box with 4 exciting activities and a book to enjoy together – £16.95 + 2.95 postage
The subscription can be cancelled or paused at any time (no commitments what so ever), and come perfectly sized to fit through your letter box, so no need to wait in for delivery. The boxes are bright and colourful and are personalised with your child’s name.
Our Experience
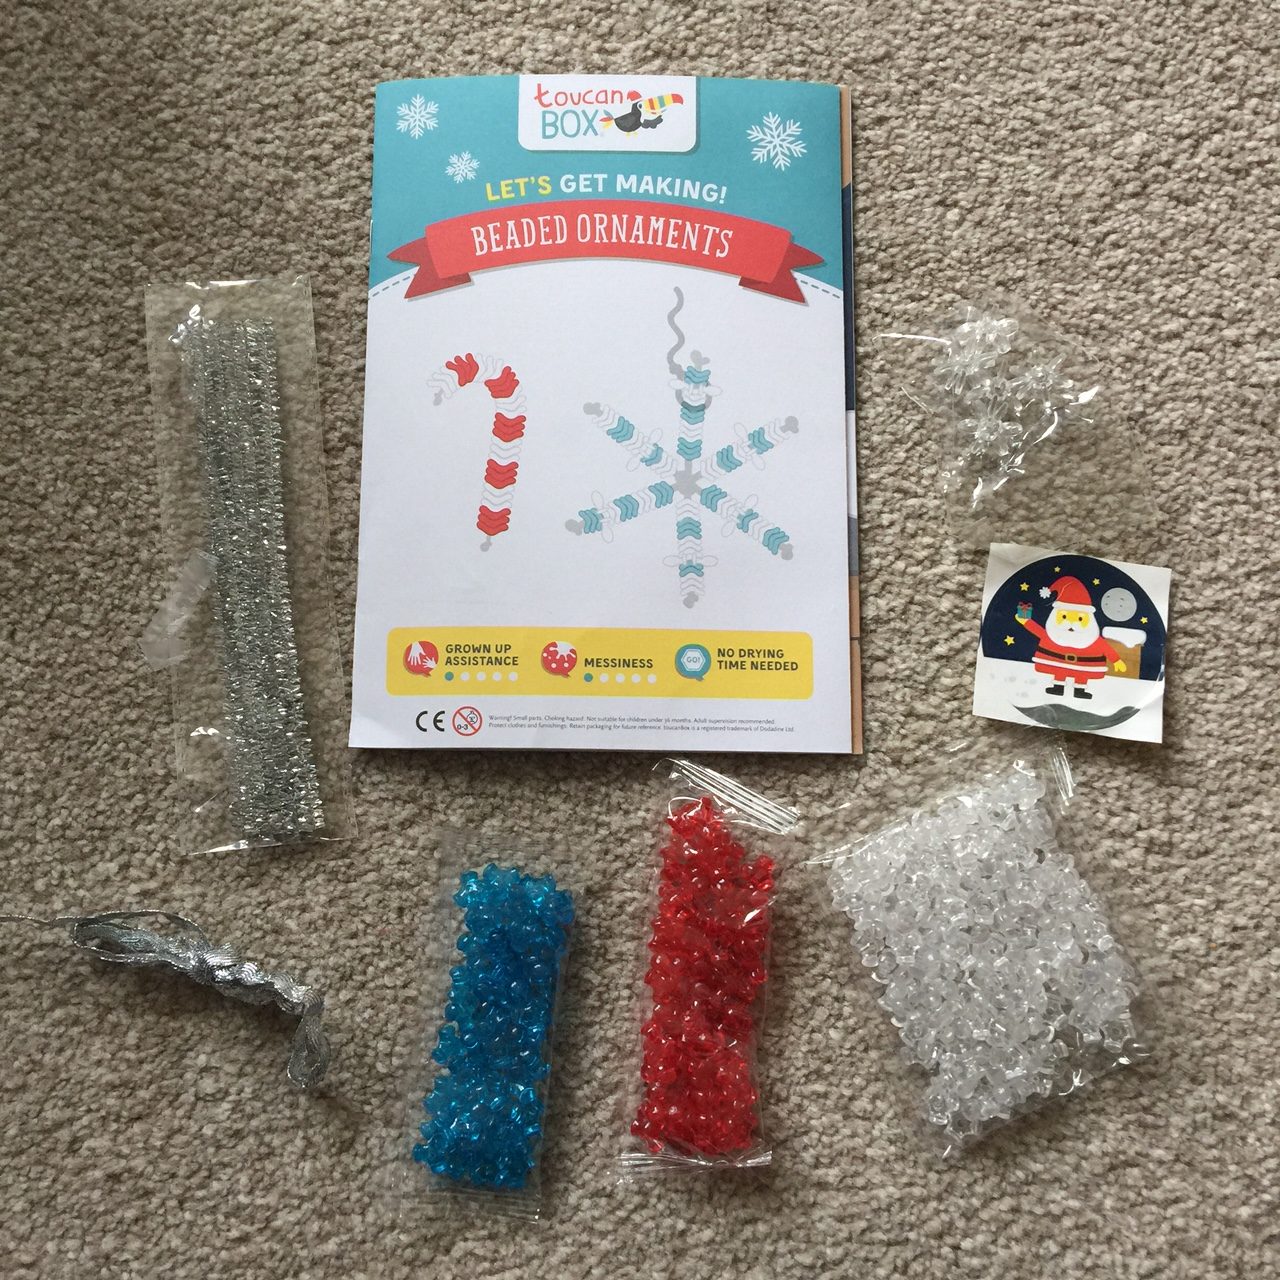
We received our first petite Toucan Box craft subscription box yesterday for our daughter who is 3 years old. Erin was super excited when she saw the little box that had her name on the front, and was very keen to open it up and see what was inside. You can see our unboxing video here:
This particular Toucan Box was a special edition box for Christmas, with everything we needed inside to make our own festive decorations – including candy canes and a snowflake. These looked super cute and were something that I knew Erin would enjoy hanging on the tree afterwards!
At first sight, I was a little concerned that it may be a bit fiddly for Erin to do, as the beads are quite small. That said, she actually surprised me with how much her fine motor skills had developed since we last did a threading activity.
Mummy did have to help her a little, including starting her off with the beads and creating the loop at the end of the candy cane. The snowflake involved a bit more Mummy assistance, in terms of bending the three pipe cleaners together to form the snowflake shape.
The Toucan Box activity kept Erin content for at least 30 minutes, and she was over the moon with her creations.
There was minimal waste (some beads left over), so the quantities provided are more than sufficient for the projects described. The Toucan box also contained an activity booklet and a sticker, both of which Erin appreciated.
Overall, I really enjoyed the Toucan Box craft box with Erin, and we are looking forward to the next one’s arrival! 🙂
Pros:
Everything you need is in the box in just the right quantities, no more running off to the craft store and buying things in HUGE sizes just for one simple project. I am guilty of spending £20 a time in Hobbycraft just to make one simple project, so this is definitely a good money saving exercise!
Fun one on one time with your little one.
Tailored to age by educational experts.
High quality craft creations and something I wouldn’t have been able to come up with myself!
Subscription can be cancelled at any time.
Cons:
Like with all subscriptions you need to stay on top of your account. If you forget to pause when you go on holiday, you will still be charged as the boxes are posted out. That said, the boxes can always be stockpiled for a rainy day!
Being picky, but the personalisation could be better – the name on the front of the box wasn’t central or straight, and for someone with a little bit of OCD this could have been better. It felt like it had been a little rushed during packing!
If you have younger siblings, you do need to be conscious of the small parts. If my youngest was on the move or crawling, I think I would be a bit paranoid about some of the beads falling off on to the floor! “
It’s officially the countdown to Christmas – 24 days until the big guy arrives, and 24 days to entertain a very excitable toddler!! As you will have seen from my previous posts, I LOVE making craft projects with my daughter, and over the next few weeks we will be having a Christmas theme to our creations! So far, we have made Easy Paper Christmas Trees and a Reindeer Handprint Tee! Today, we are making Christmas Bauble prints using potatoes! 🙂 These are SOOOO easy to do and lots of fun too!
To make these you will need:
Bright coloured paint – classic Christmassy colours like red and green work well.
White of coloured paper or card.
A large potato
A sharp knife or scalpel (adults only!!)
Glue
Decorations – we used sequins and glitter.
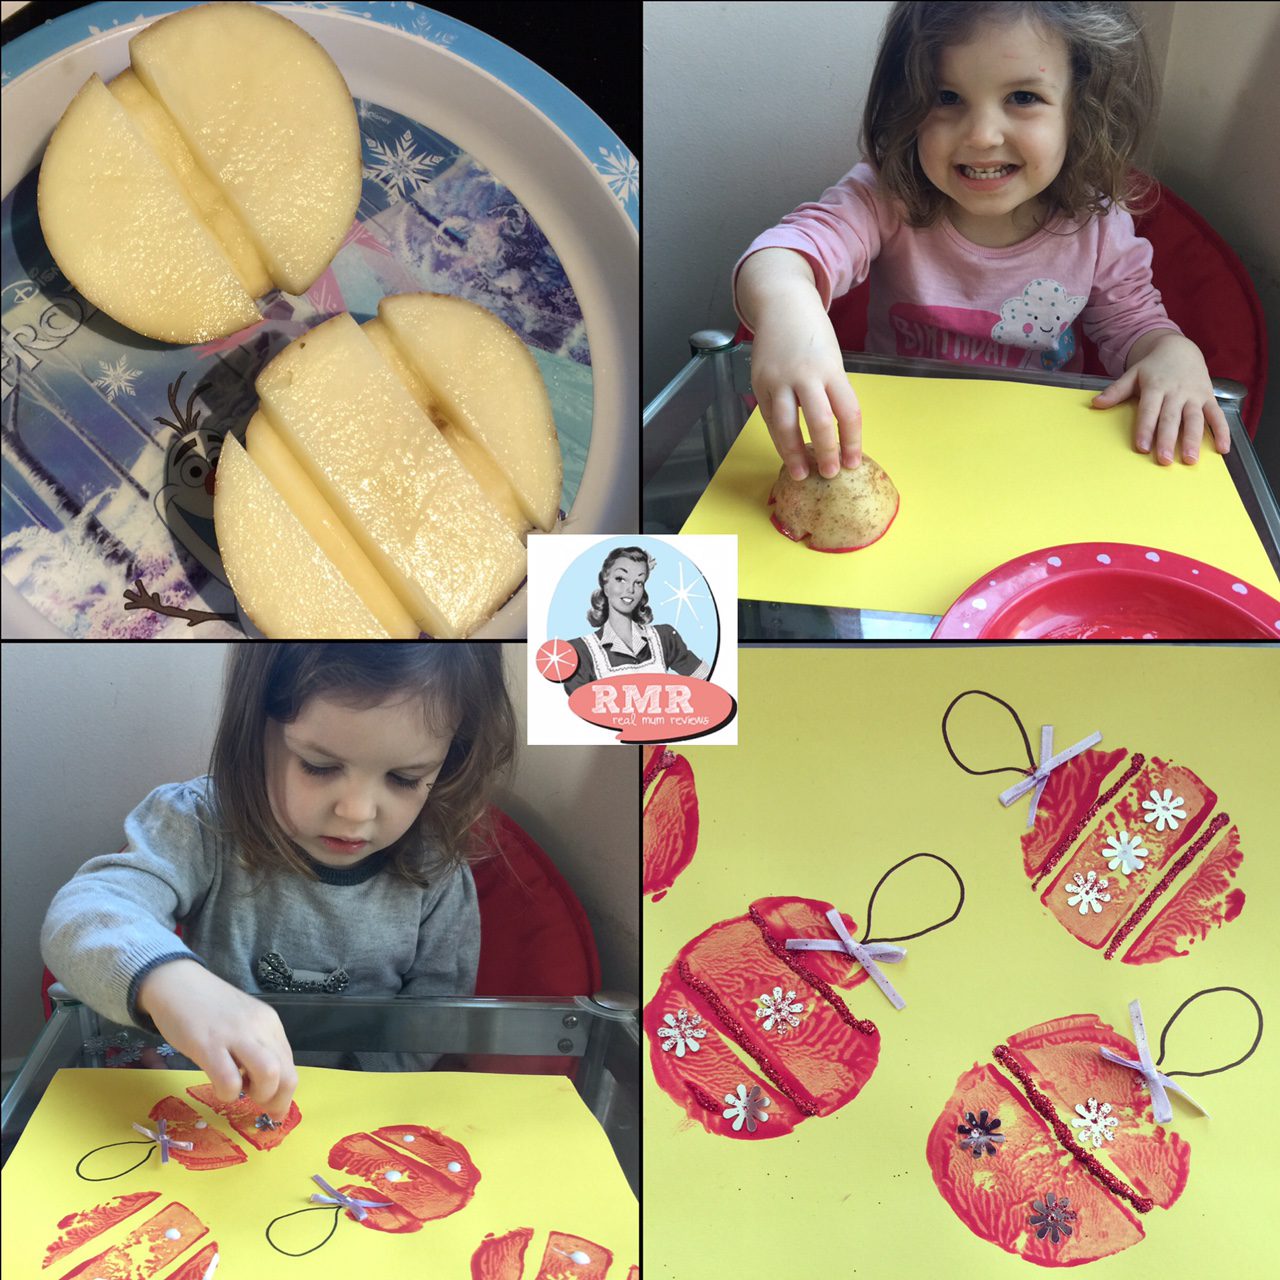
First you need to create your bauble print. To do this, chop the potato in half and cut two strips out of the potato to create ‘ridges’ where no paint will settle. This creates the effect of a ribbon or design on your bauble once printed. On the other half of the potato, create a different design. This could be another strip, or zig zag pattern if you prefer.
Using a plate or tray, pour some of the paint out and stamp the potato into the paint. Print on to the paper, pulling away in a firm swift motion if possible (to avoid the paint smudging). Repeat as many times as you wish! 🙂
Once dried, you can decorate your baubles. We used glue and glitter to create a shiny ribbon effect, and added some sequins. Erin LOVED the decorating part of this craft, and loved how pretty they were!
You can leave the finished design as a whole sheet of baubles or cut them individually. The baubles cut up make great features for home made Christmas Cards! 🙂
Hi, I’m Lucy, a thirty something mum of two from Birmingham. A memory maker, tradition keeper, stationery addict and Mr Men fanatic. HR Advisor by day and sleep deprived Mama by night!
This website uses cookies so that we can provide you with the best user experience possible. Cookie information is stored in your browser and performs functions such as recognising you when you return to our website and helping our team to understand which sections of the website you find most interesting and useful.
Strictly Necessary Cookies
Strictly Necessary Cookie should be enabled at all times so that we can save your preferences for cookie settings.
If you disable this cookie, we will not be able to save your preferences. This means that every time you visit this website you will need to enable or disable cookies again.
3rd Party Cookies
This website uses Google Analytics to collect anonymous information such as the number of visitors to the site, and the most popular pages.
Keeping this cookie enabled helps us to improve our website.
Please enable Strictly Necessary Cookies first so that we can save your preferences!